In my first post of this series I looked at some considerations of designing a store / phone app. This post will cover the basics of creating a new Phone / Store app.
Universal App
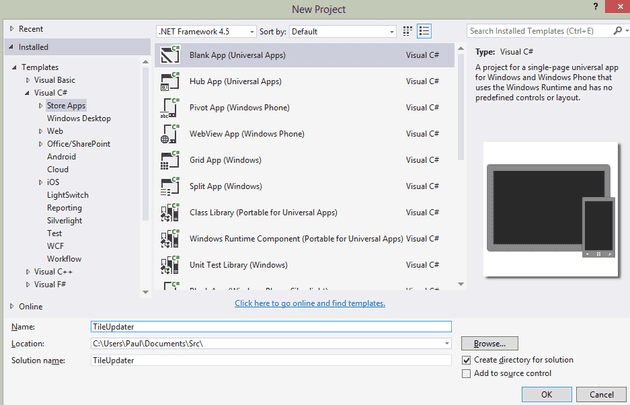
The new type of application is called a Universal App - so let’s create one:
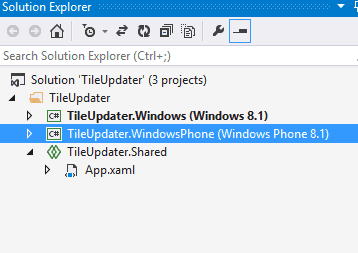
I’m going to select a blank app, and create the project. What this gives me is a solution containing three separate projects.
If I select to run the Windows app I get a blank Windows Store App, and if I select to run the phone app I get a blank phone app. The shared project can be used to create a common application lifecycle, share events and logic. However, the UI is separate (ish - we’ll come back to that in a later post). Let’s start with the Window 8 app
Create the tile image
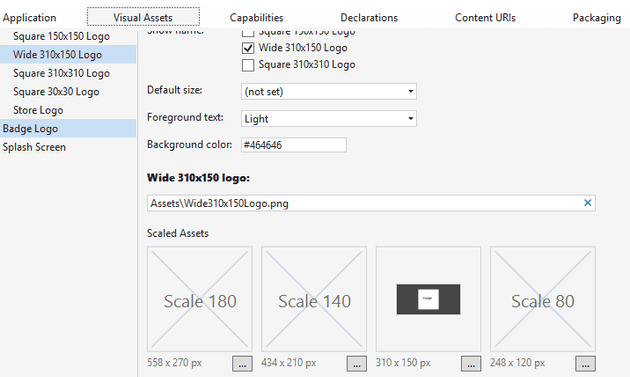
You can’t update a tile that doesn’t exist; for this example, we’re going to update the wide tile, so you’ll need one. Just create any image 310 x 150 as a png file and point your Windows app at it:
The app will use a wide tile if it is present on the first install only. If you miss this, then uninstall using the following option:
Create the tile updater
Next, create another tile image - just copy the first and change the text or draw something on it. Add this to your Windows 8.1 project, and call it test.png (place it under the Assets folder).
The code to update a tile in Windows 8 is as follows:
        private static void UpdateTileImage(string image)
        {
            XmlDocument xmlDoc = TileUpdateManager.GetTemplateContent(TileTemplateType.TileWide310x150Image);

            XmlElement imageNode = (XmlElement)xmlDoc.GetElementsByTagName("image")[0];
            imageNode.SetAttribute("src", string.Format("ms-appx://{0}", image));

            Windows.UI.Notifications.TileUpdater tileUpdater = TileUpdateManager.CreateTileUpdaterForApplication();
            TileNotification tileNotification = new TileNotification(xmlDoc);
            tileUpdater.Update(tileNotification);
        }
A little (actually not so little) gotcha is that Live Tiles don’t work in the simulator (http://social.msdn.microsoft.com/Forums/windowsapps/en-US/8357462e-f97b-48c2-8fea-57d47c7ead2a/do-live-tiles-updated-properly-in-the-simulator?forum=toolsforwinapps)
Testing is further complicated because tiles are not automatically pinned to the start menu; so you may deploy and not see your tile. Even worse, I noticed a few times that despite the tile not being on the start screen, on searching for it, Windows claimed it was (so I had to un-pin and re-pin).
Just write the code for Windows
Okay, so let’s just create the tile updater inside Windows 8.1 (this is the code for MainPage.xaml.cs):
        private void Button\_Click(object sender, RoutedEventArgs e)
        {
            UpdateTileImage();
        }

        private void UpdateTileImage(string image)
        {
            XmlDocument xmlDoc = TileUpdateManager.GetTemplateContent(TileTemplateType.TileWide310x150Image);

            XmlElement imageNode = (XmlElement)xmlDoc.GetElementsByTagName("image")[0];
            imageNode.SetAttribute("src", string.Format("ms-appx://{0}", image));

            Windows.UI.Notifications.TileUpdater tileUpdater = TileUpdateManager.CreateTileUpdaterForApplication();
            TileNotification tileNotification = new TileNotification(xmlDoc);
            tileUpdater.Update(tileNotification);
        }

        public void UpdateTileImage()
        {
            string image = "/Assets/test.png";
            UpdateTileImage(image);
        }
If you need the XAML, it’s here:
        Image


        Text


        Update
Conclusion
You now have a little program for Windows 8.1 that updates tiles based on a button click. In the next post, we’ll move this into the shared project and call it from the phone app, too. In later posts, I’ll change and refactor the architecture, too.


