In this article, I discussed the use of Azure functions; however, Web Jobs perform a similar task. Azure Functions are effectively an abstraction on top of Web Jobs - meaning that, while you have more control when using Web Jobs, there’s a little more to do when writing them.
This article covers the basics of Web Jobs, and has a walk-through for creating a very simple task using one.
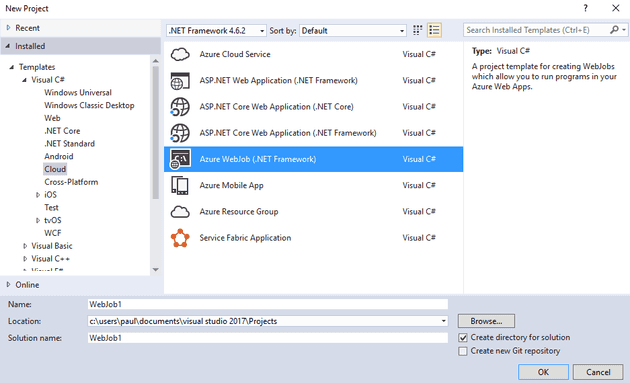
Create a new Web Job
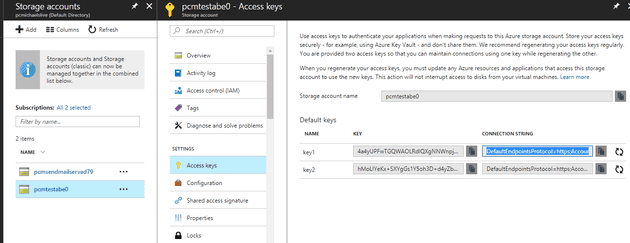
Once you create this project, you’ll need to fill in the following values in the app.config:
<configuration>
  <connectionStrings>
    <!-- The format of the connection string is "DefaultEndpointsProtocol=https;AccountName=NAME;AccountKey=KEY" -->
    <!-- For local execution, the value can be set either in this config file or through environment variables -->
    <add name="AzureWebJobsDashboard" connectionString="" />
    <add name="AzureWebJobsStorage" connectionString="" />
  </connectionStrings>
These can both be the same value, but they refer to where Azure stores it’s data.
AzureWebJobsDashboard
This is the storage account used to store logs.
AzureWebJobsStorage
This is the storage account used to store whatever the application needs to function (for example: queues or tables). In the example below, it’s where the file will go.
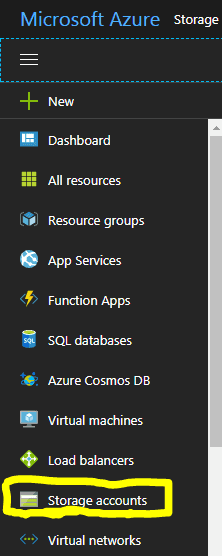
Storage accounts can be set-up from the Azure dashboard (more on this later):
A Basic Application
For this example, let’s take a file from a blob storage and parse it, then write out the result in a log. Specifically, we’ll take an XML file, and write the number of nodes into a log; here’s the file:
<test>
    <myNode>
    </myNode>
    <myNode>
    </myNode>
</test>
I think we’ll probably be looking for a figure around 2.
Blob Storage
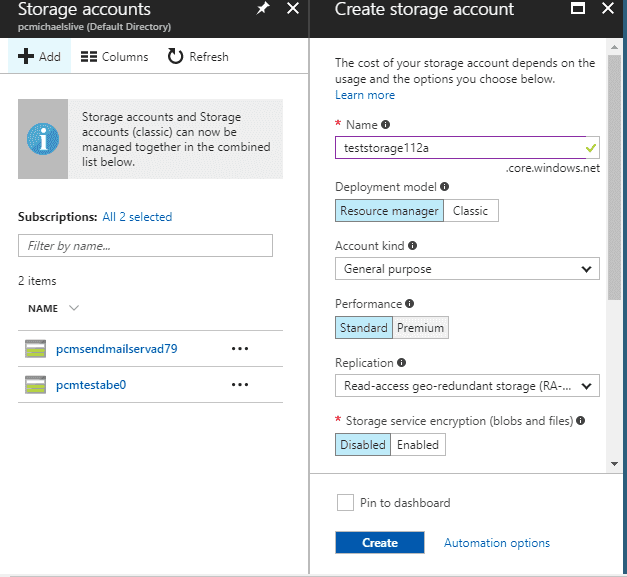
Before we can do anything with blob storage, we’ll need a new storage area; create a new storage account:
Set the storage kind to “General Storage” (because we’re working with files); other than that, go with your gut.
Uploading
Once you’ve created the account, you’ll need to add a file - otherwise nothing will happen. You can do this in the web portal, or you can do it via a desktop utility that Microsoft provide: Storage Explorer.
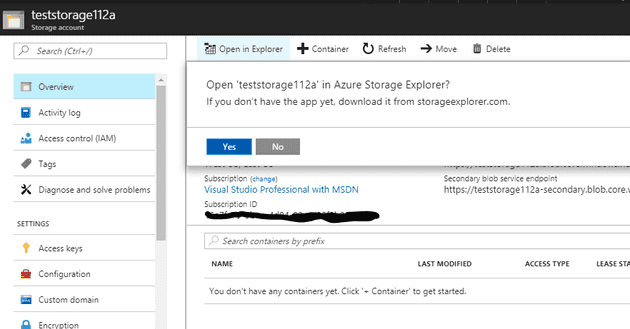
I kind of expected this to take me to the web page mentioned… but it doesn’t! You have to navigate there manually:
Install it… unless you want to upload your file using the web portal… in which case: don’t.
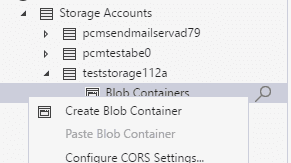
We can create a new container:
Now, we can see the storage account and any containers:
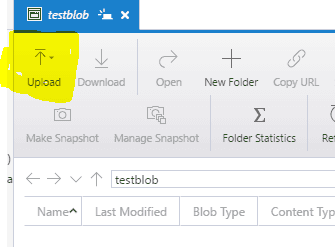
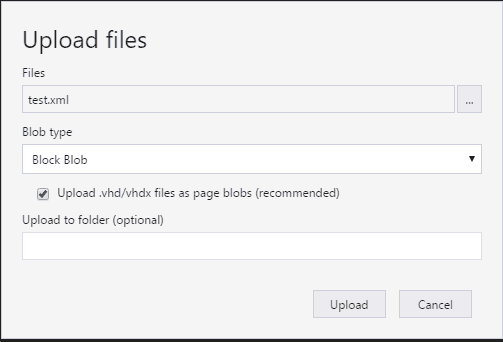
Now, you can upload a file from here (remember that you can do all this inside the Portal):
Once you’ve created this, go back and update the storage connection string (described above). You may also want to repeat the process for a dashboard storage area (or, as stated above, they can be the same).
Programmatically Downloading
Now we have a file in the directory, it can be downloaded via the WebJob; here’s a function that will download a file:
        public static async Task<string> GetFileContents(string connectionString, string containerString, string fileName)
        {
            CloudStorageAccount storage = CloudStorageAccount.Parse(connectionString);
            CloudBlobClient client = storage.CreateCloudBlobClient();
            CloudBlobContainer container = client.GetContainerReference(containerString);
            CloudBlob blob = container.GetBlobReference(fileName);

            MemoryStream ms = new MemoryStream();
            await blob.DownloadToStreamAsync(ms);
            ms.Position = 0;

            StreamReader sr = new StreamReader(ms);
            string contents = sr.ReadToEnd();
            return contents;
        }
The code to call this is here (note the commented out commands from the default WebJob Template):
        static void Main()
        {
            Console.WriteLine("Starting");

            var config = new JobHostConfiguration();

            if (config.IsDevelopment)
            {
                config.UseDevelopmentSettings();
            }

            //var host = new JobHost();

            string fileContents = AzureHelpers.GetFileContents(config.StorageConnectionString, "testblob", "test.xml").Result;
            Console.WriteLine(fileContents);

            // The following code ensures that the WebJob will be running continuously
            //host.RunAndBlock();

            Console.WriteLine("Done");
        }
Although this works (sort of - it doesn’t check for new files, and it would need to be run on a scheduled basis - “On Demand” in Azure terms), you don’t need it (at least not for jobs that react to files being uploaded to storage containers). WebJobs provide this functionality out of the box! There are a number of decorators that you can use for various purposes:
- string
- TextReader
- Stream
- ICloudBlob
- CloudBlockBlob
- CloudPageBlob
- CloudBlobContainer
- CloudBlobDirectory
- IEnumerable
- IEnumerable
Here, we’ll use a BlobTrigger and accept a string. Moreover, doing it this way makes the writing to the log much easier, as there’s injection of sorts (at least I’m assuming that’s what it’s doing). Here’s what the complete solution looks like in the new paradigm:
        public static void ProcessFile([BlobTrigger("testblob/{name}")] string fileContents, TextWriter log)
        {
            XmlDocument xmlDoc = new XmlDocument();
            xmlDoc.LoadXml(fileContents);
            log.WriteLine($"Node count: {xmlDoc.FirstChild.ChildNodes.Count}");
        }
The key thing to notice here is that the function is static and public (the class it’s in needs to be public, too - even is that’s the Program class). The WebJob framework uses reflection to work out which functions it needs to run.
The other point to note is that I’m getting the parameter as a string - the article above details what you could have it as; for example, if you wanted to delete it afterwards, you’d probably want to use an ICloudBlob or something similar.
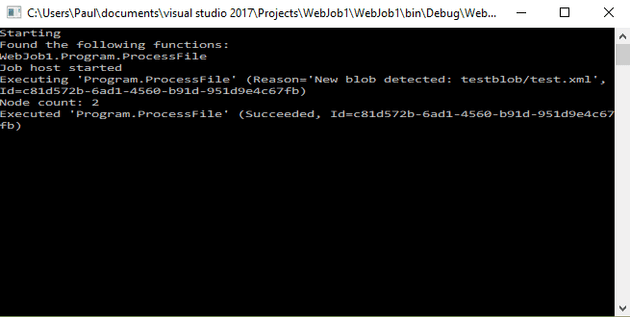
Anyway, it works:
The log file
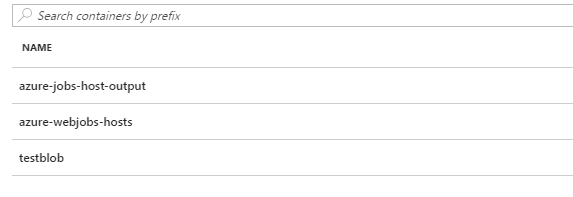
Remember the storage area that we specified for the dashboard earlier? You should now see some new containers created in that storage area:
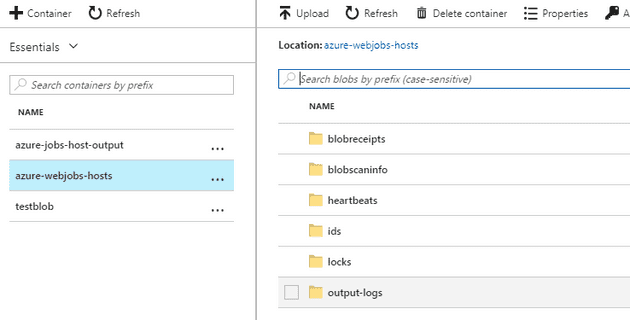
This has created a number of directories, but the one that we’re interested in is “output-logs” in the “azure-webjobs-hosts” container:
And here’s the log itself:
References
https://docs.microsoft.com/en-us/azure/app-service-web/web-sites-create-web-jobs
https://stackoverflow.com/questions/36610952/azure-webjobs-vs-azure-functions-how-to-choose
http://www.hanselman.com/blog/IntroducingWindowsAzureWebJobs.aspx
